1- Disclaimer
RhinoCentre Training Approach
This training module is part of a systematic series of training modules developed by RhinoCentre. Especially the training module "Prepare 2D input" is useful for any Rhino user.About the author
 Tobias Nagel is a real Rhinophile. In the year 2000 he entered the realm of 3D modeling when he discovered Rhinoceros with its flexibility and ease of use. From that moment on he continuously developed his modeling skills. By now his CAD service company has an impressive portfolio with interesting projects and clients involving modeling with, teaching and programming Rhino. Since 2012 he is sharing his vast expertise in developing training modules for, and together with RhinoCentre.
About RhinoCentre
Since 2003 RhinoCentre shares and increases Rhino knowledge in offering training, consultancy and other services to the marine industry worldwide. The best example is the joined development of the Rapid Hull Modeling Methodology with people of several companies and organizations. On the other hand is RhinoCentre in close contact with McNeel & Associates, the developers of Rhino as well as plugin developers to make Rhino even better. RhinoCentre maintains with most of their customers a long lasting relationships based on trust and equality. Please contact us if you need any help regarding Rhino related issues.About the value of this training
We have invested more than a decade of experience in this training. To develop a training module like this one takes us at least three months. You and your company paid for this in time and money. Please keep this in mind in case you’re considering giving this training (or the associated training files) away, or even worse, publishing it on internet. There is no way we can prevent this with protections. Actually we don’t even want to try. We simply trust you on this.
|
3- How to learn Rhino
 Learning how to use commands and know how to find them again is the key to your success.
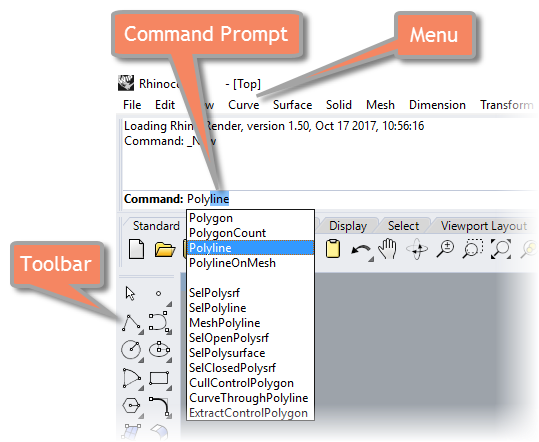
Most commands can be activated in four ways:
Learning how to use commands and know how to find them again is the key to your success.
Most commands can be activated in four ways:
- By typing them at the Command Prompt
- Via the Menu structure on top of the Rhino screen
- By clicking on an Icon in a Toolbar
- With an Alias (short cut)
When typing letters in the command prompt, Rhino presents all commands that contain these letters. This is a useful Rhino feature to find specific Rhino commands.
Rhino Command Help
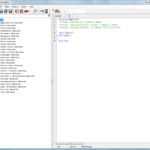
[caption id="attachment_8666" align="alignright" width="688"] Fig.1: The CommandHelp panel[/caption]
Use the Rhino Command Help with Auto-Update (Fig.1) to teach you how a specific command works and where to find it.
Click the + to learn where to find a specific command in the menu or toolbars.
If the Command Help panel is not visible use the command _CommandHelp to show it.
Fig.1: The CommandHelp panel[/caption]
Use the Rhino Command Help with Auto-Update (Fig.1) to teach you how a specific command works and where to find it.
Click the + to learn where to find a specific command in the menu or toolbars.
If the Command Help panel is not visible use the command _CommandHelp to show it.
Rhino newsgroup & forum
If you get stuck with a problem post it on the Rhino user forum at: discourse.mcneel.com. Often within an hour you will get one or more answers from McNeel employees or other Rhino users. It is advised to send a Rhino file with the problem or add some screenshots.4- Before you start
To make sure the steps done in this manual are working as expected some standard settings are needed. Exercise 1: Before you start [video width="1280" height="720" mp4="https://www.rhinocentre.nl/wp-content/uploads/2017/10/Ex-01-Preparations.mp4"][/video]Exercise 1: Before you start[caption id="attachment_8667" align="alignnone" width="700"]
- Make sure 'Grid Snap' is turned off and 'Ortho', 'Osnap' and 'Planar' is turned on in the status bar (Fig.2)
Fig.2: Osnap toolbar & Status bar[/caption] [caption id="attachment_8662" align="alignright" width="412"]
Fig.3: Layer manager panel[/caption]
- Make sure that the Osnap toolbar is visible (Fig.2). If it’s not, go to 'Tools' > 'Object Snap' > and check 'Persistent Osnap Dialog'
- In the Osnap toolbar (Fig.2), turn on the following object snaps: 'End', 'Near', 'Point', 'Mid', 'Cen', 'Int'
- Make sure the Layer manager panel is visible (Fig.3). If it’s not, then run the _Layer command
- Download now the necessary training files: M0R1 - Training Files - Online
- Make sure to store the files in a secure place on your hard drive.
- Now copy the training files folder to the desktop. This makes it most easy to access the necessary files during the training.
- At last, create a new folder on your desktop and name it "WIP" (Work In Progress). In this folder you can save your training files thus keeping the original files clean.
Rhino viewport orientation
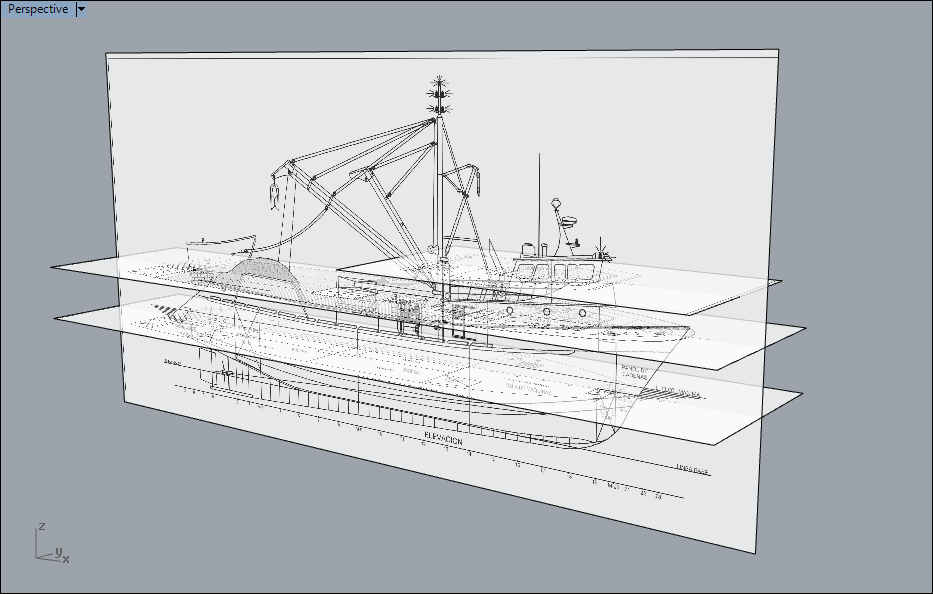
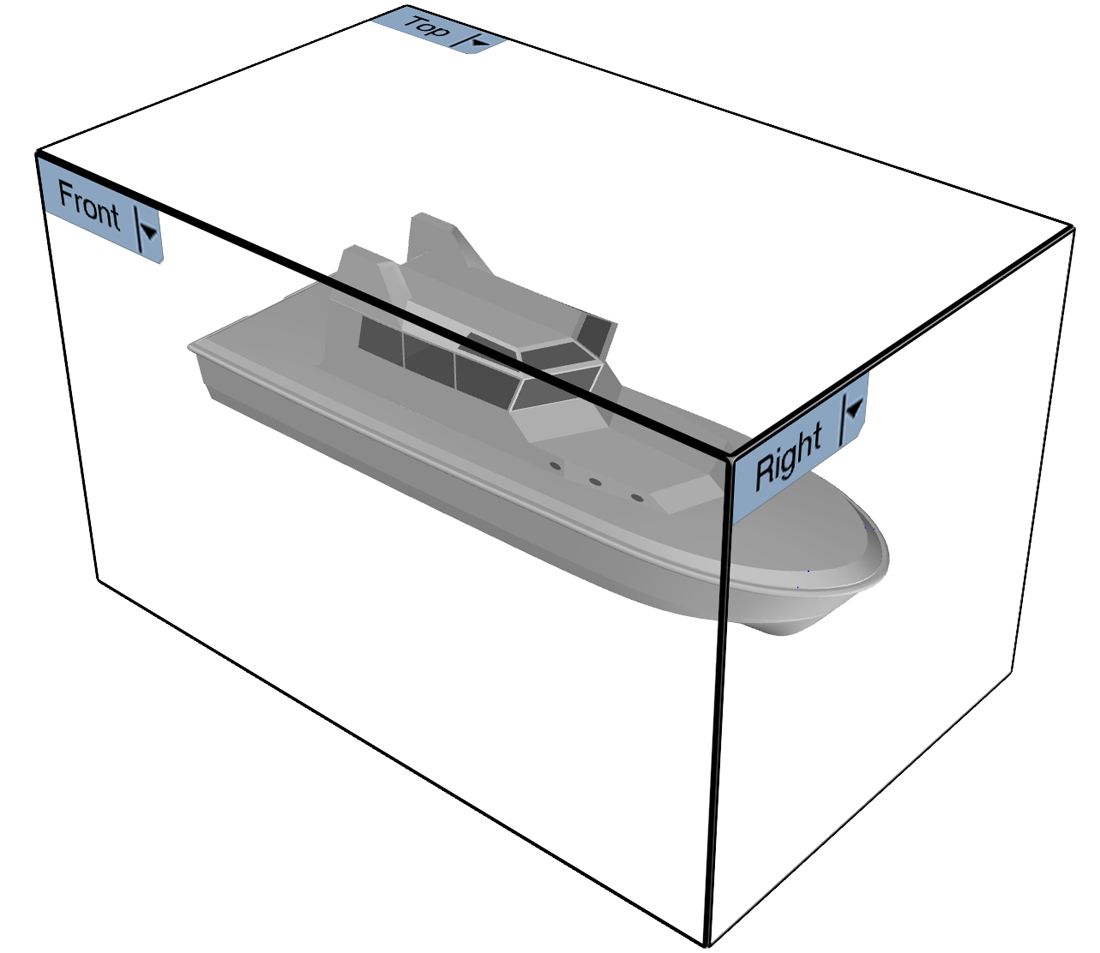 At this point one word about Rhino viewport orientation in Rhino. In naval architecture, the hull center line orientation is along the X-axis which is unfortunately inconsistent with the Rhino viewport setup because:
- The side view of the hull is called 'Front' in Rhino.
- The front view is called 'Right' in Rhino.
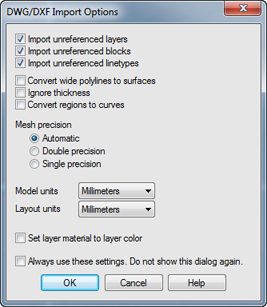 Fig.4: DWG/DXF Import Options dialog[/caption]
 Fig.5: The File Options dialog[/caption]
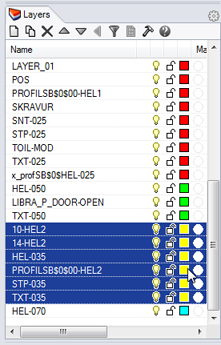 Fig.6: Select yellow layers[/caption]
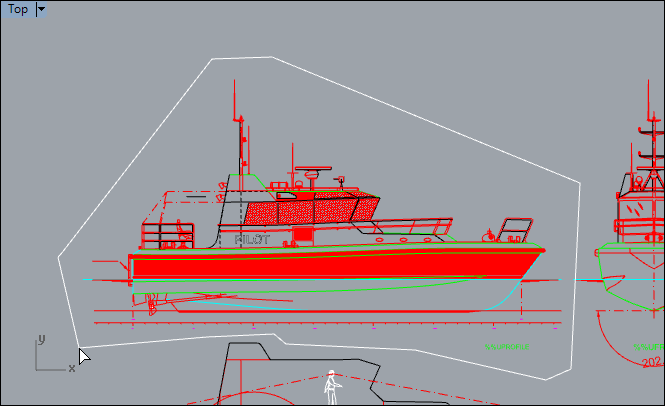 Fig.7: Lasso select[/caption]
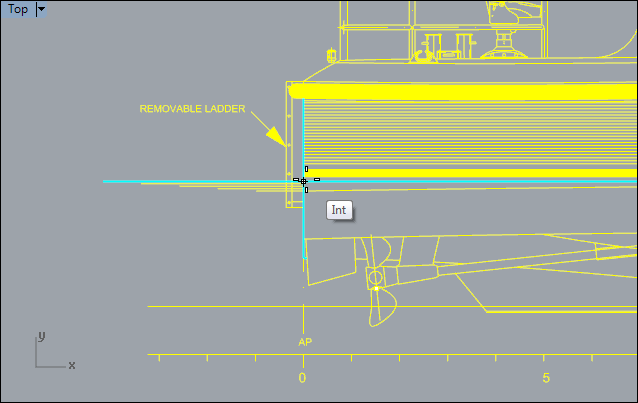 Fig.8: Intersection of the waterline and frame 0 in the "PROFILE" block[/caption]
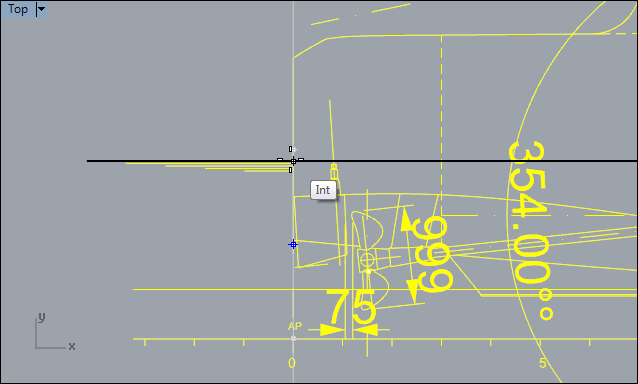 Fig.9: Intersection of the waterline and frame 0 in the "CENTERLINE SECTION" block[/caption]
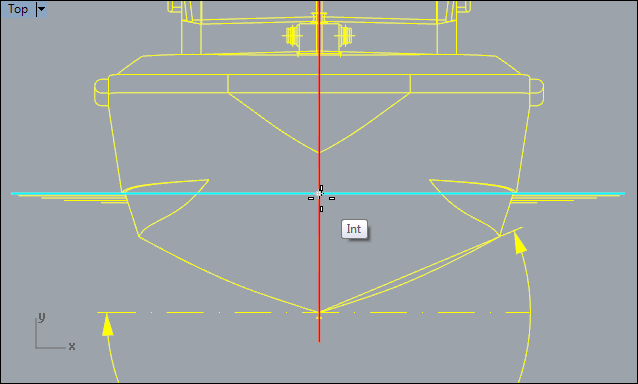 Fig.10: Intersection of the waterline and frame 0 in the "FRONT VIEW" block[/caption]
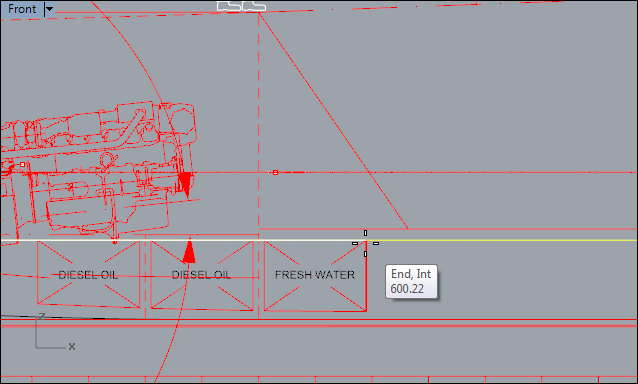 Fig.11: Snap to one of the tank top lines[/caption]
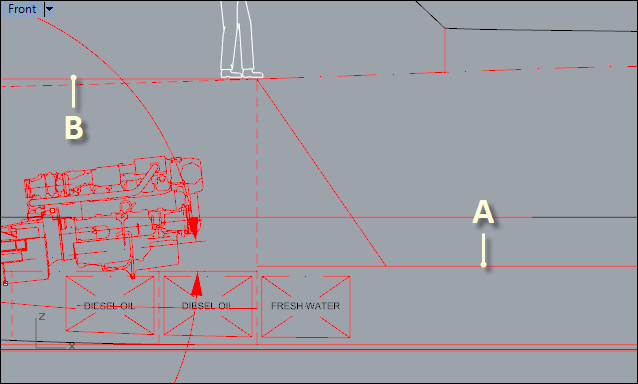 Fig.12: Specify the height with these points[/caption]
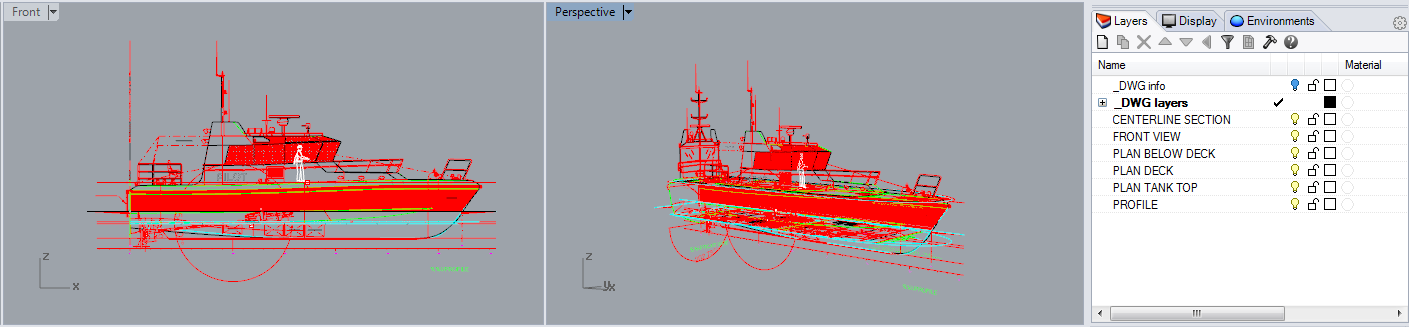
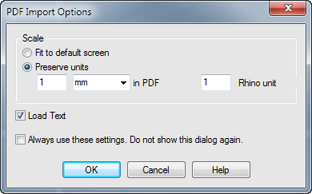 Fig.13: PDF Import Options dialog[/caption]
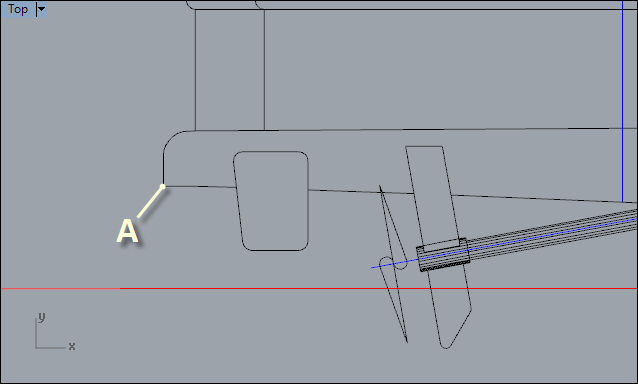 Fig.14: Point A at the stern[/caption]
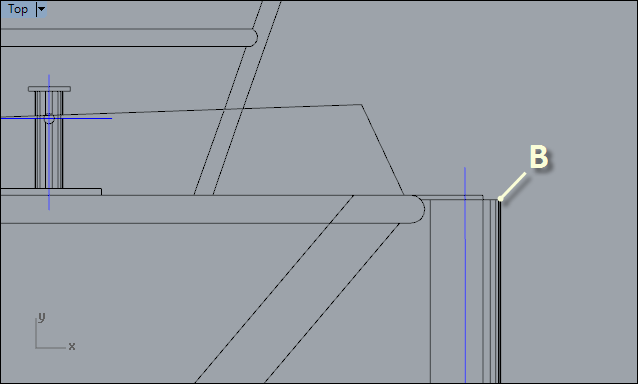 Fig.15: Point B at the bow-fender[/caption]
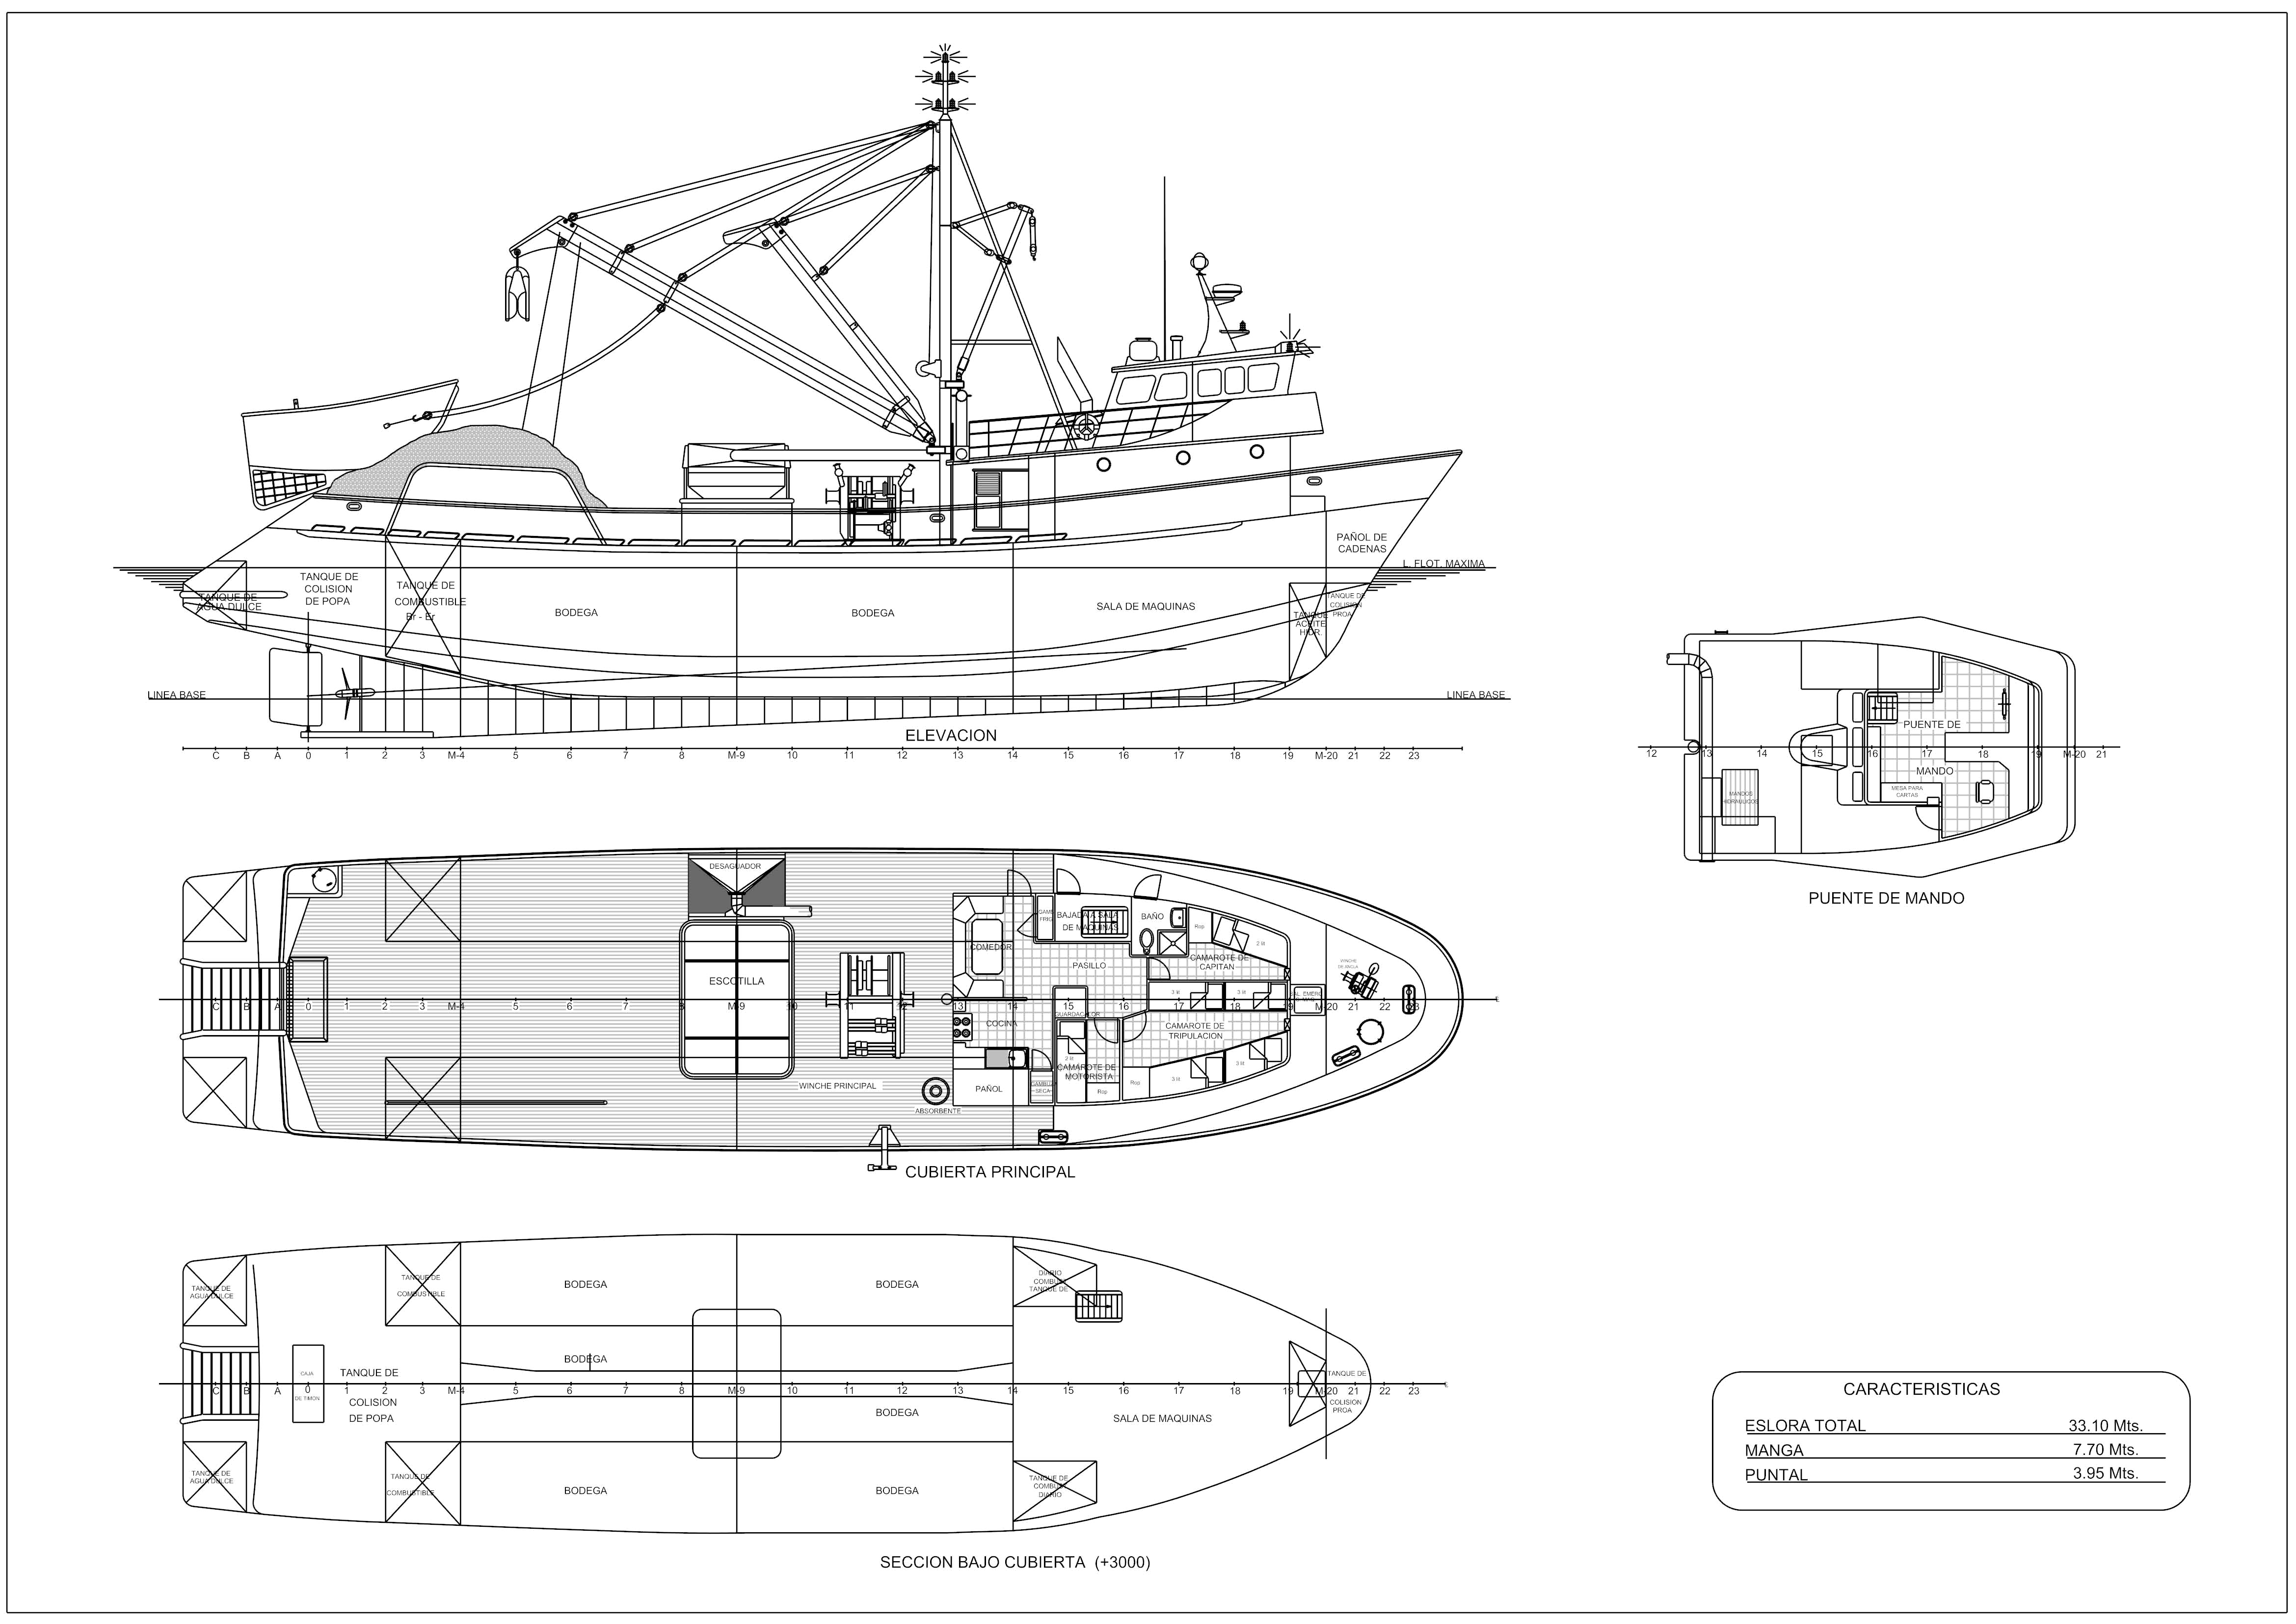 Neptuno.pdf[/caption]
A raster PDF is simply an image wrapped in a PDF. If you try to open such a PDF Rhino will present you with an "There are no objects to load..." error message (just try and see for yourself with the "Neptuno.pdf" example file). The only way to use the information of a raster PDF is to extract the image and use it as explained in the next section under 'Using images'.
In the following exercises we'll extract the contents of a raster PDF using Microsoft Paint (of course you can use any other image-editor like Photoshop or IrfanView but for this exercise we'll stick to Paint cause it’s available on all Windows systems). The resulting image will be our example file in the following section 'Using images'.
Exercise 12: Prepare the image
[video width="1280" height="720" mp4="https://www.rhinocentre.nl/wp-content/uploads/2017/10/Ex-12-Prepare-the-image.mp4"][/video]
Neptuno.pdf[/caption]
A raster PDF is simply an image wrapped in a PDF. If you try to open such a PDF Rhino will present you with an "There are no objects to load..." error message (just try and see for yourself with the "Neptuno.pdf" example file). The only way to use the information of a raster PDF is to extract the image and use it as explained in the next section under 'Using images'.
In the following exercises we'll extract the contents of a raster PDF using Microsoft Paint (of course you can use any other image-editor like Photoshop or IrfanView but for this exercise we'll stick to Paint cause it’s available on all Windows systems). The resulting image will be our example file in the following section 'Using images'.
Exercise 12: Prepare the image
[video width="1280" height="720" mp4="https://www.rhinocentre.nl/wp-content/uploads/2017/10/Ex-12-Prepare-the-image.mp4"][/video]
 Fig.16: Point A on the left end of the frames-strip[/caption]
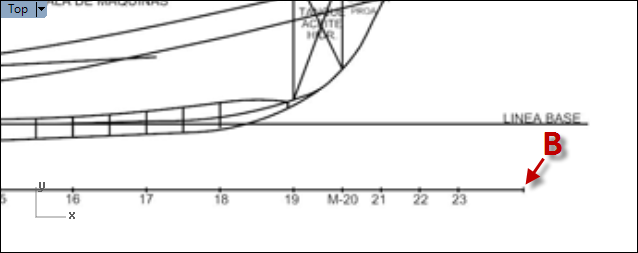 Fig.17: Point B on the right end of the frames-strip[/caption]
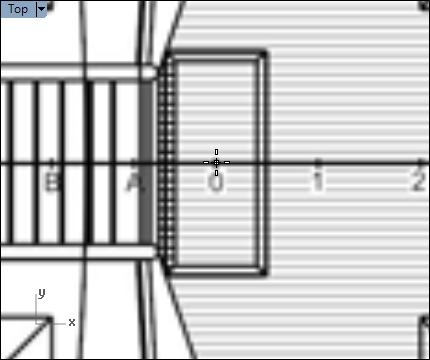 Fig.18: Frame 0 on the centerline of the main-deck view[/caption]
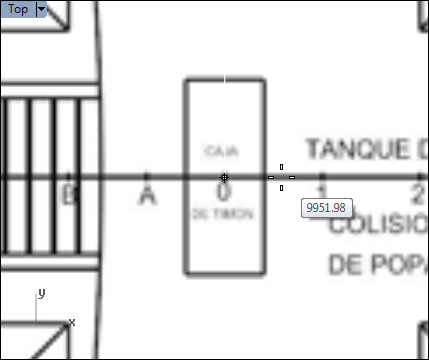 Fig.19: Frame 0 on the centerline of the lower-deck view[/caption]
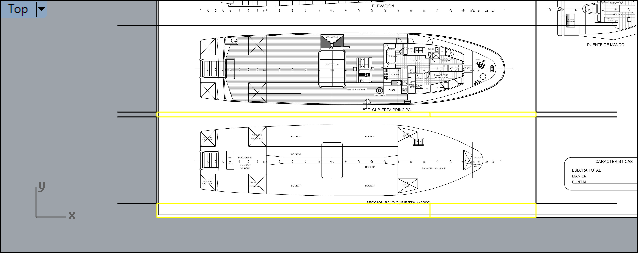 Fig.20: Select and delete the strips underneath[/caption]
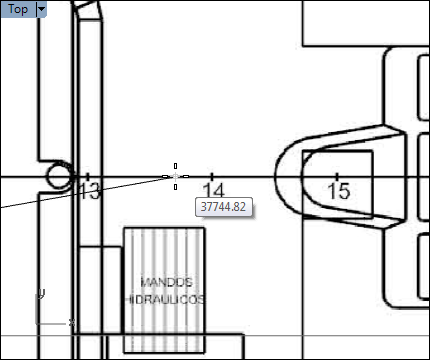 Fig.21: Pick a point on the centerline of the bridge view[/caption]
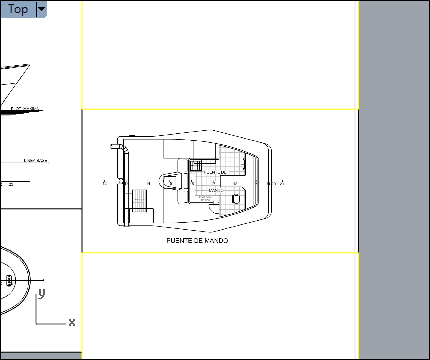 Fig.22: Pieces above and below the command-bridge view[/caption]
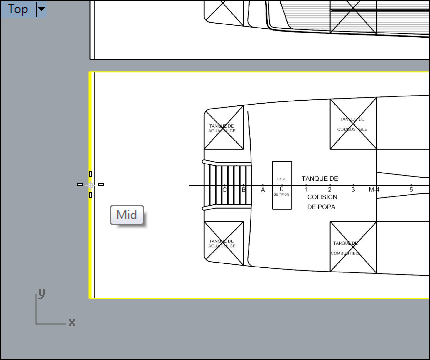 Fig.23: Snap to the midpoint of the left edge[/caption]
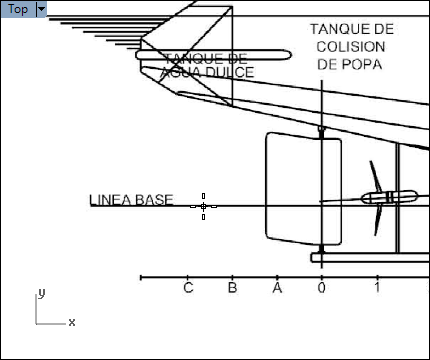 Fig.24: Pick a point on the baseline of the profile view[/caption]
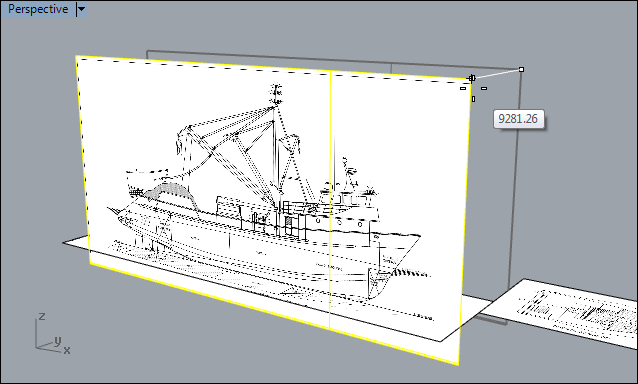 Fig.25: Move the "PROFILE" pictureframe to 0 using TAB[/caption]
 Exercise 16: Transparency and saving
[video width="1280" height="720" mp4="https://www.rhinocentre.nl/wp-content/uploads/2017/10/Ex-16-Transparency-and-saving.mp4"][/video]
Exercise 16: Transparency and saving
[video width="1280" height="720" mp4="https://www.rhinocentre.nl/wp-content/uploads/2017/10/Ex-16-Transparency-and-saving.mp4"][/video]
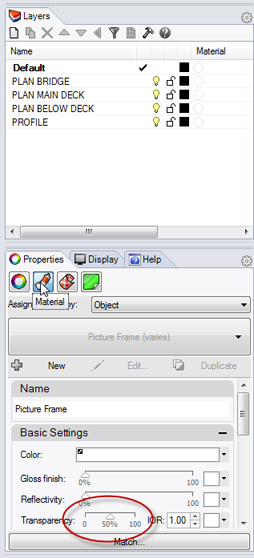 Fig.26: Material tab in theproperties panel[/caption]
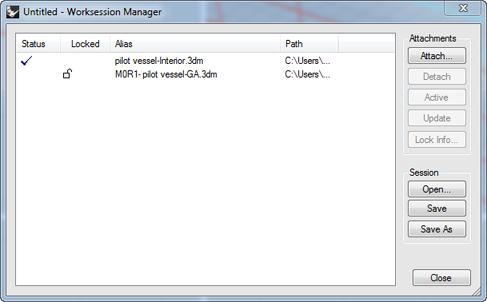 Fig.27: The worksession manager dialog[/caption]
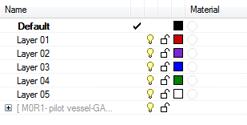 The GA appears in the scene and there's a new layer in the layer manager with the name of the attached file in square brackets and a grey color [pilot-vessel-GA.3dm].
For the hull file we'll use another convenient way to attach files:
The GA appears in the scene and there's a new layer in the layer manager with the name of the attached file in square brackets and a grey color [pilot-vessel-GA.3dm].
For the hull file we'll use another convenient way to attach files:

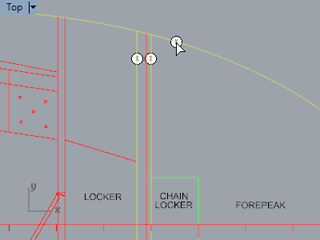 Fig.28: Select the marked curves[/caption]
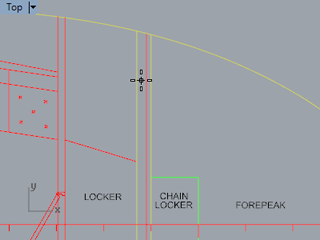 Fig.29: Click inside the selected curves[/caption]
 Extracting objects from an attached block
 is a two-step procedure. First you’ll have to copy the block to the active file and then extract objects using BlockEdit.
As an example we’ll extract the propeller-shaft centerline from the GA. Let's start by copying the "CENTERLINE SECTION"-block to the active file:
Extracting objects from an attached block
Extracting objects from an attached block is a two-step procedure. First you’ll have to copy the block to the active file and then extract objects using BlockEdit.
As an example we’ll extract the propeller-shaft centerline from the GA. Let's start by copying the "CENTERLINE SECTION"-block to the active file:
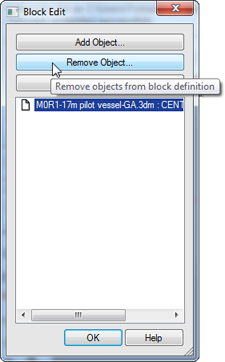 Fig 30: Block Editor[/caption]
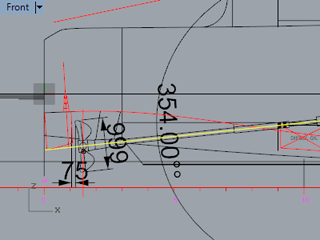 Fig.31: Select the propeller-shaft centerline[/caption]